Subfloor & Floor Preparation in Los Angeles

A successful wood flooring installation begins below the finished surface. Even premium hardwood can develop movement, gaps, squeaks, uneven areas, or moisture-related problems when it is installed over a damaged or poorly prepared base.

Professional Subfloor & Floor Preparation

A Stable, Flat, Clean, and Properly Conditioned Base

Our subfloor and floor preparation services help create a stable, flat, clean, and properly conditioned surface before hardwood or engineered wood flooring is installed.

Depending on the property, preparation may include subfloor repair, plywood installation, concrete preparation, floor leveling, moisture testing, underlayment, vapor barriers, and removal of existing flooring.

Proper preparation can make a major difference in the appearance, performance, and longevity of a new wood floor.

  • Subfloor and plywood repair or installation
  • Concrete grinding, patching, and leveling
  • Moisture testing, vapor barriers, and underlayment
  • Old flooring, adhesive, and fastener removal
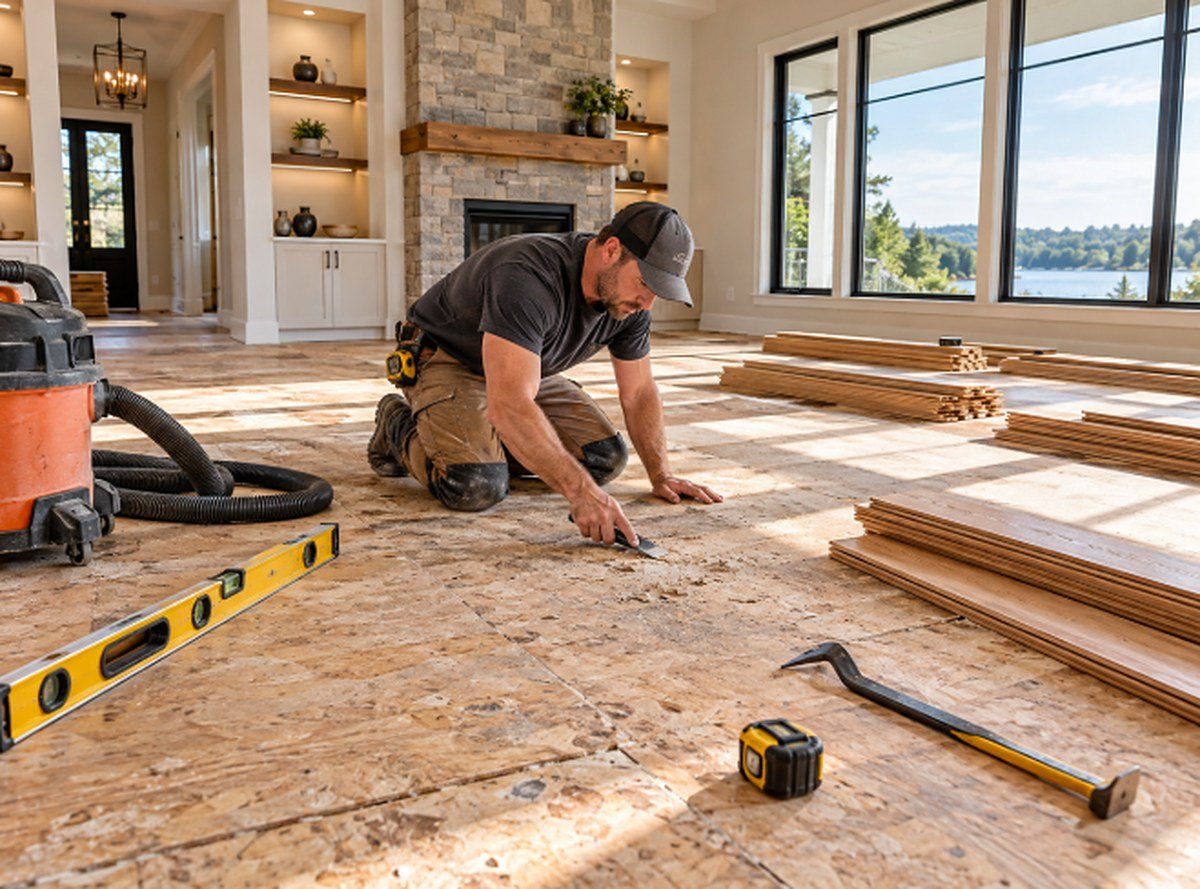
Flooring specialist inspecting and preparing a plywood subfloor before hardwood installation

Subfloor Installation & Repair

Plywood and Wood Subfloors Built to Support Hardwood

01

Subfloor Installation

A subfloor provides the structural surface underneath the finished flooring. In many homes, plywood or oriented strand board is installed over floor joists to create the base for hardwood.

New subfloor may be needed during remodeling, additions, new construction, or when the existing material is too damaged. It should be secure, properly fastened, and suited to the flooring system.
02

Subfloor Repair

Subfloor problems can show through the finished hardwood. Common signs include:

  • Soft spots
  • Squeaking
  • Movement
  • Uneven flooring
  • Cracked panels
  • Water damage
  • Loose sections
  • Sagging areas

Damaged areas may be reinforced, patched, or replaced before new flooring goes down.

03

Plywood Subfloor Installation

Plywood is commonly used as a base for nail-down and staple-down hardwood. The correct thickness and construction depend on the floor system, joist spacing, and flooring requirements.

Panels are installed securely with appropriate spacing, and loose edges, damaged sections, and protruding fasteners are corrected before installation.

04

Plywood Subfloor Repair

Plywood can be damaged by moisture, age, impact, or repeated movement. Localized repair may be possible when only a small area is affected.

Sections with rot, delamination, severe swelling, or lost strength are replaced, and repairs are installed flush to avoid a visible height difference.

Concrete Floor Preparation

Preparing Slabs for Engineered and Glue-Down Flooring

01

Concrete Slab Evaluation

Engineered hardwood and certain wood flooring systems may be installed over concrete when the slab meets product requirements. Concrete is evaluated for:

  • Moisture
  • Flatness
  • Cracks
  • Adhesive residue
  • Surface contamination
  • High spots
  • Low areas
  • Structural damage

The slab may need cleaning, grinding, patching, leveling, or moisture control first.

02

Floor Grinding

Grinding removes high spots, adhesive residue, coatings, and surface irregularities from concrete, preparing the slab for glue-down flooring or leveling materials.

Dust-control equipment may be used to reduce airborne debris during the process.

03

Concrete Crack Repair

Some cracks need to be repaired or stabilized before installation. Small non-structural cracks are different from active structural movement.

The type and cause of each crack are considered before covering the area, and large or moving cracks may require additional evaluation.

Leveling, Flattening & Stabilizing

Fixing Uneven Floors, Squeaks, and Soft Spots

01

Floor Leveling

Wood flooring performs best over a flat surface. Leveling may include:

  • Sanding high areas
  • Grinding concrete
  • Filling low spots
  • Leveling compounds
  • Repairing panels
  • Reinforcing weak areas

The method depends on whether the floor is wood, concrete, or another approved base.

02

Uneven Floor Repair

Uneven floors can result from subfloor movement, settling, previous construction, moisture damage, or structural conditions.

Minor unevenness is corrected during preparation; larger elevation changes may need more extensive work or structural evaluation, and the cause is identified first.

03

Floor Flattening

Flatness is different from levelness. A floor doesn't always need to be perfectly level, but it does need to be flat enough for the selected flooring system.

Long dips or humps create movement and stress in hardwood, so flattening creates a uniform surface and improves how the finished floor feels.

04

Subfloor Squeak Repair

Squeaks develop when panels move against joists, fasteners, or neighboring materials. Accessible squeaky areas can often be secured before new flooring goes down.

Fixing squeaks before installation is usually much easier than repairing them after the new floor is complete.

05

Soft Spot Repair

Soft spots may indicate water damage, weakened plywood, poor support, or deterioration below the surface. Installing hardwood over them can lead to movement or damage.

The area is opened and inspected, and damaged material is repaired or replaced before the project continues.

06

Subfloor Reinforcement

Weak or flexible subfloors may need additional support before hardwood installation.

Reinforcement can involve adding fasteners, blocking, new plywood layers, or replacing weak sections, reducing movement and improving the finished floor's performance.

Moisture Testing, Moisture & Vapor Barriers

One of the Most Important Factors in Wood Flooring

Moisture Testing

Both the flooring material and the installation surface may need to be tested before work begins. Excessive moisture can contribute to:

  • Cupping
  • Buckling
  • Swelling
  • Gaps
  • Adhesive problems
  • Finish damage

Readings are evaluated according to the requirements of the selected flooring and installation system.

Concrete Moisture Testing

Concrete slabs can release moisture even when the surface looks dry, so conditions are evaluated before glue-down or floating engineered flooring is installed. If levels exceed product requirements, additional moisture control may be needed, and active leaks or drainage issues are always corrected first.

Wood Subfloor Moisture Testing

Leaks, crawlspace humidity, recent construction, and poor ventilation can all affect wood subfloors. Comparing the moisture content of the subfloor and the flooring shows whether installation conditions are appropriate.

Moisture Barrier Installation

Some installations require a moisture barrier between the subfloor and flooring, such as over concrete slabs. The product depends on the flooring type and base, and must be compatible with the flooring and installation method.

Vapor Barrier Installation

Vapor barriers reduce moisture vapor transmission from below in certain concrete, crawlspace, basement, or ground-level installations. Seams, edges, and penetrations must be installed correctly, and product requirements are reviewed carefully since systems vary.

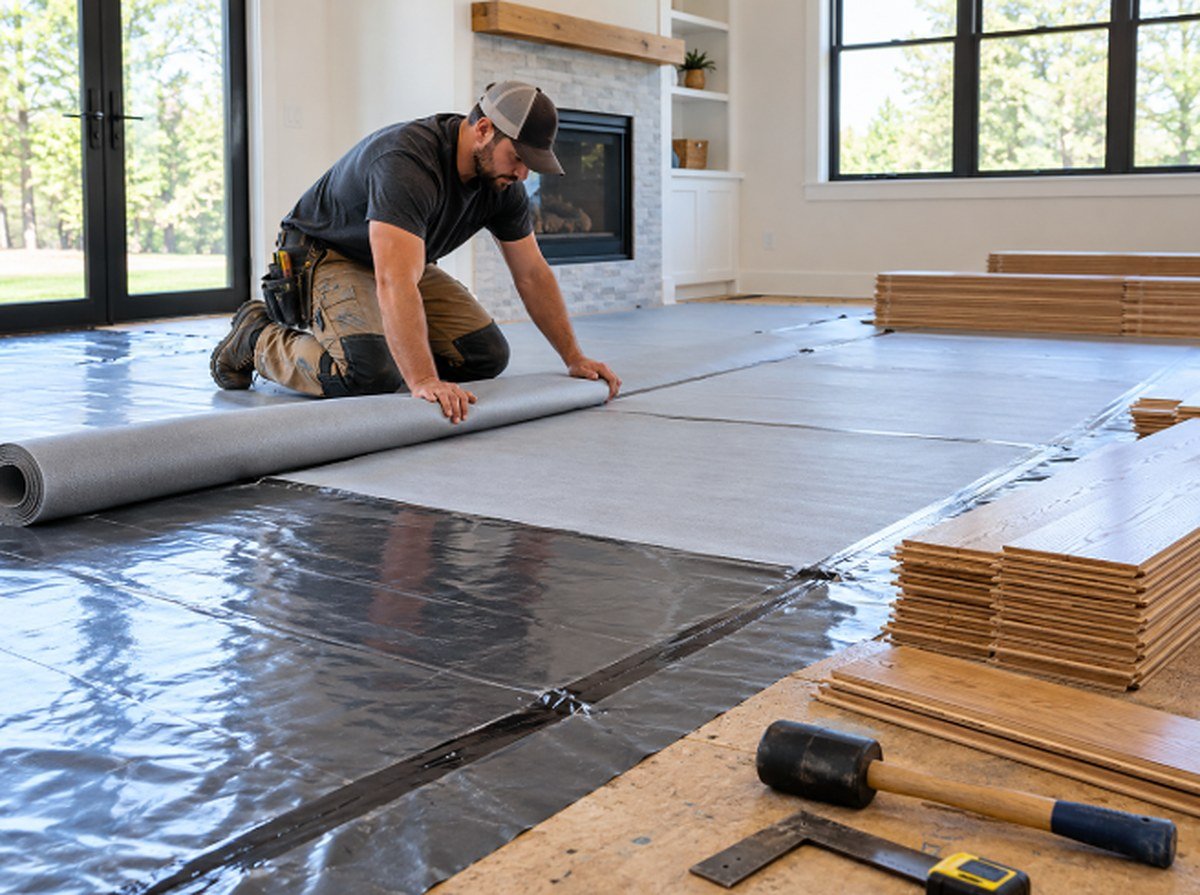
Installer rolling out underlayment over a vapor barrier before engineered wood installation

Underlayment Installation

Sound Reduction, Cushioning, and Moisture Control

01

Underlayment Installation

Underlayment may be installed beneath floating engineered flooring and other compatible products. Depending on the material, it can provide:

  • Sound reduction
  • Minor cushioning
  • Moisture control
  • Thermal benefits
  • Smoother movement

It's selected based on the flooring manufacturer and property requirements.

02

Sound-Reducing Underlayment

Sound control is especially important in condos, apartments, townhomes, and upper-level installations, and some buildings require flooring assemblies to meet specific sound standards.

Approved acoustic underlayment may help reduce impact noise between floors. Building requirements are reviewed before materials are selected.

03

Underlayment for Engineered Wood

Floating engineered wood often requires an underlayment designed for the specific product. Some flooring has attached padding, while others need a separate layer.

Using the wrong material can affect joint performance or void product requirements, so installation instructions are always followed.

Existing Flooring Removal

Clearing the Way for Your New Wood Floor

Old flooring often needs to be removed before new hardwood installation. We prepare surfaces after removal of carpet, laminate, vinyl, hardwood, engineered flooring, tile, and floating floors. The amount of preparation depends on what remains underneath. Replacing your whole floor? See wood floor replacement.

01

Carpet Removal

Carpet, padding, staples, and tack strips are removed, then the exposed subfloor is checked for stains, damage, squeaks, and uneven areas and repaired before hardwood goes in.

02

Tile Removal

Tile often leaves mortar, backer board, or adhesive behind. The surface may be scraped, ground, patched, or leveled, and the floor height is evaluated against adjacent rooms.

03

Vinyl Flooring Removal

Glued vinyl and old underlayment can leave adhesive residue. The surface is cleaned and prepared for the new floor, and older materials may require special handling during removal.

04

Laminate Flooring Removal

Floating laminate and its underlayment are removed so the subfloor can be inspected. Loose sections, moisture damage, or uneven areas are corrected before new material is installed.

05

Old Hardwood Removal

Removal depends on whether the floor was nailed, stapled, or glued, and whether any wood will be reused. Fasteners, adhesive, damaged underlayment, and debris are then cleared.

06

Adhesive Removal

Old adhesive can create an uneven or contaminated surface. Scraping, grinding, or approved products remove it, and the new adhesive system must be compatible with the prepared surface.

07

Staple and Nail Removal

Carpet, hardwood, and underlayment can leave many staples or nails. Protruding fasteners can damage underlayment, create unevenness, or affect plank placement, so they're removed or addressed.

08

Baseboard and Trim Preparation

Baseboards and shoe molding may be removed before installation and reinstalled or replaced afterward, maintaining proper expansion space while creating a finished edge. See trim & finishing.

Preparation by Flooring Type

Nail-Down, Glue-Down, Floating, Wide Plank, and Patterned Floors

01

Preparing Floors for Nail-Down Hardwood

Nail-down hardwood requires a suitable wood subfloor that can hold fasteners properly. Preparation may include:

  • Checking panel thickness
  • Securing loose areas
  • Removing squeaks
  • Flattening
  • Testing moisture
  • Cleaning
02

Preparing Floors for Glue-Down Hardwood

Glue-down flooring requires a clean, stable, properly prepared surface. Dust, paint, oil, old adhesive, moisture, and unevenness can all affect adhesive performance.

Concrete and wood bases may need different preparation, and only compatible adhesives and primers are used.

03

Preparing Floors for Floating Hardwood

Floating floors aren't attached to the subfloor, but the base still needs to be flat and stable. Uneven surfaces can cause clicking, movement, or stress on locking joints.

Preparation may include leveling, cleaning, installing approved underlayment, and controlling moisture.

04

Floor Preparation for Wide Plank Hardwood

Wide planks are less forgiving of uneven subfloors, so the base is carefully evaluated for flatness, moisture, and stability.

Proper acclimation matters too, because wider boards respond more noticeably to environmental changes.

05

Floor Preparation for Herringbone and Chevron

Patterned flooring depends on precise alignment, so small high spots or dips make it hard to keep the pattern consistent.

The subfloor must be flat, clean, and stable before layout begins.

06

Doorway and Transition Preparation

Doorways and transitions are evaluated before installation begins. Changes in material or floor height may require transition pieces, thresholds, or additional preparation.

Planning these details in advance creates a cleaner finished appearance. See transitions & thresholds.

Preparation for Every Project

Water Damage, Remodels, Older Homes, New Builds, and Condos

01

Floor Preparation After Water Damage

Water-damaged areas are fully evaluated first: locating the moisture source, removing damaged flooring, drying and testing the area, replacing damaged subfloor, and leveling repairs. New hardwood waits until proper conditions return. See water damage repair.

02

Floor Preparation During Remodeling

Removing walls, cabinets, tile, or built-ins can expose areas that need patching or new subfloor and change floor heights. Planning preparation with the remodel creates smoother transitions between old and new spaces.

03

Subfloor Preparation for Older Homes

Older properties may contain multiple layers, previous repairs, uneven framing, old fasteners, or damaged boards. A detailed inspection determines what to remove, reinforce, level, or preserve.

04

Subfloor Preparation for New Construction

Subfloors are protected from rain and construction moisture and allowed to reach proper conditions. Debris, drywall compound, and paint are removed, and moisture testing confirms the structure is ready.

05

Condo and Apartment Floor Preparation

Multi-unit buildings may have special requirements for sound control, underlayment, floor height, and permitted installation systems, sometimes with specific acoustic products or documentation, reviewed before buying materials.

06

Preparation for Every Wood Floor

Whether you're installing hardwood, engineered wood, or new stairs, the right preparation is planned around the specific flooring product and property conditions.

Professional Floor Preparation Process

A typical preparation project may include the following steps. The exact process depends on the property and flooring system.

  1. 01Inspecting the existing floor
  2. 02Removing old flooring
  3. 03Clearing nails, staples, and adhesive
  4. 04Inspecting the subfloor
  5. 05Testing moisture
  6. 06Repairing damaged areas
  7. 07Securing loose sections
  8. 08Flattening or leveling the surface
  9. 09Installing moisture protection if required
  10. 10Installing approved underlayment
  11. 11Cleaning the installation area
  12. 12Verifying the floor is ready for installation

Subfloor & Floor Preparation FAQs

Answers to Common Floor Preparation Questions

1.

Why is subfloor preparation so important?

Your new wood floor is only as good as the surface underneath it. A damaged, uneven, or damp subfloor can cause squeaks, gaps, movement, cupping, and even flooring failure, no matter how high-quality the hardwood is. Proper preparation, including repairs, leveling, moisture testing, and the right underlayment, helps your new floor look better, feel solid underfoot, and last much longer.

2.

How do I know if my subfloor needs repair?

Common warning signs include soft or spongy spots, squeaking, noticeable movement, sagging or uneven areas, cracked panels, and past water damage. Sometimes problems are hidden until the old flooring is removed. We inspect the subfloor during the evaluation and again after removal, then explain any issues we find and the repair options before installation continues.

3.

Can hardwood be installed directly over concrete?

Many engineered wood products can be installed over concrete, which is very common in Los Angeles homes and condos. Solid hardwood usually isn't glued directly to a slab. We test the concrete for moisture, check flatness, repair cracks, grind high spots, and install the right moisture barrier or adhesive system, then glue down or float the flooring as the manufacturer requires.

4.

What is the difference between a floor being level and flat?

Level means the floor is horizontal, while flat means the surface is even without dips or humps. A floor doesn't always need to be perfectly level, but it must be flat enough for the flooring system you choose. Dips and ridges can cause wood floors to move, click, or feel uneven, so we flatten the surface by sanding, grinding, or using leveling compounds.

5.

Do I need underlayment under my new wood floor?

It depends on the flooring and the building. Floating engineered floors usually require an underlayment made for that product, and some products include attached padding. Condos and upper floors often need sound-reducing underlayment to meet HOA sound requirements. Nail-down hardwood over plywood typically uses a different underlay. We choose the right option based on manufacturer and building requirements.

Start Your Wood Flooring Project With Proper Preparation

A Stronger Foundation for Your New Floor

The finished hardwood is only as good as the surface underneath it. Proper subfloor preparation can help reduce movement, unevenness, moisture problems, squeaks, and other issues that may affect the flooring after installation.

Whether your project requires plywood repair, concrete preparation, leveling, moisture testing, underlayment, old-floor removal, or a complete new subfloor, careful preparation creates a stronger foundation for the new wood floor.

Contact us to schedule a floor evaluation, discuss preparation requirements, and request an estimate for your wood flooring project.

Book Service

Get a Free Estimate for Your Wood Flooring Project