Wood Flooring Trim & Finishing in Los Angeles

The final details around a wood floor make a major difference in how complete and professional the installation looks. Baseboards, shoe molding, quarter round, transitions, thresholds, stair nosing, and custom trim cover expansion gaps, create clean edges, and connect the flooring to walls, doorways, stairs, and adjoining materials.

Professional Trim & Finishing Services

Careful Measurements, Clean Cuts, and Coordinated Materials

Our wood flooring trim and finishing services are designed to complete new hardwood and engineered wood installations with careful measurements, clean cuts, and coordinated materials.

Whether you are installing flooring in one room or throughout an entire property, the right finishing details help create a more polished and consistent result.

  • Baseboards, shoe molding, and quarter round
  • Transitions, reducers, T-molding, and thresholds
  • Stair nosing, landing trim, and custom trim
  • Flush-mount and surface-mount wood vents
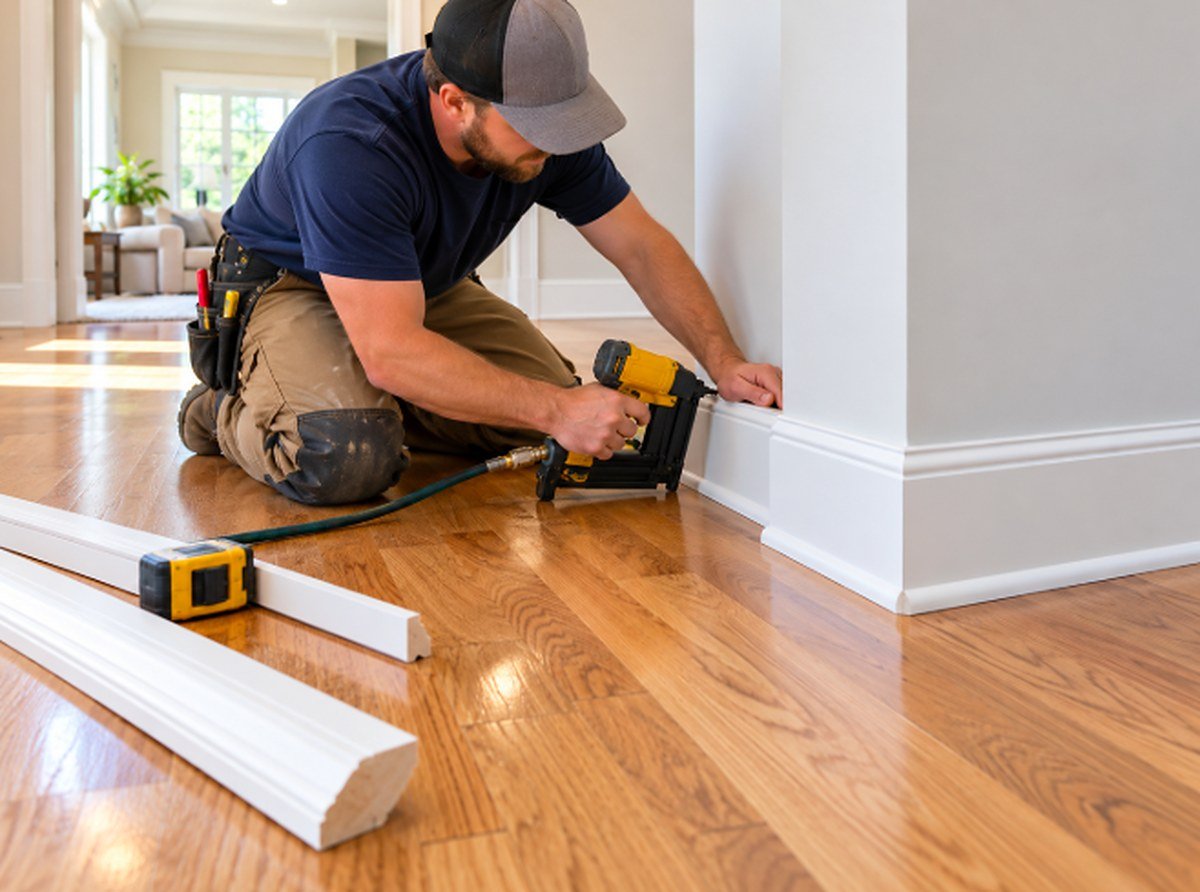
Carpenter nailing new white baseboard trim above hardwood flooring

Baseboard Installation & Replacement

New, Reinstalled, Painted, or Stained Baseboards

01

Baseboard Installation

Baseboards create a finished transition between wall and floor. Existing baseboards may be removed and reinstalled, replaced, or left in place. Common options include:

  • Modern square
  • Traditional profile
  • Tall baseboards
  • Painted
  • Stained wood
  • Custom profiles

Height and style are matched to the architecture of the property.
02

Baseboard Replacement

Old baseboards may be damaged, outdated, cracked, or too short after flooring changes. Replacing them with the floor creates a more cohesive look.

New baseboards can also cover old paint lines or gaps that appear after removing carpet or changing floor height.

03

Baseboard Removal & Reinstallation

Existing baseboards can often be carefully removed before installation and reinstalled afterward, keeping proper perimeter expansion space while creating a cleaner edge.

Some trim can be reused, while older or brittle pieces may be damaged during removal and need replacement.

04

Baseboard Height Selection

Baseboard height influences the overall look of the room. Lower profiles suit simple or contemporary interiors, while taller baseboards create a more substantial architectural look.

Room size, ceiling height, and existing trim guide the choice.

05

Stained Wood Baseboards

Stained baseboards complement hardwood and create a traditional or natural wood look in oak, walnut, maple, and other species.

The stain can match the floor or be lighter or darker for contrast. See stain options.

06

Painted Baseboards

Painted baseboards are one of the most common options. White is popular because it contrasts cleanly with both light and dark hardwood.

Other neutral or custom colors can coordinate with the walls and interior design.

Shoe Molding & Quarter Round

Covering Expansion Gaps With a Finished Edge

01

Shoe Molding Installation

Shoe molding is a narrow trim installed along the bottom of the baseboard to cover the small expansion space and give a finished look.

Its slimmer profile makes it popular in modern and traditional homes, painted to match the baseboard or stained to match the floor.

02

Quarter Round Installation

Quarter round's rounded profile covers expansion gaps between flooring and baseboards, and is often used when existing baseboards stay in place.

It can be painted, stained, or selected in a matching wood finish.

03

Shoe Molding vs. Quarter Round

Both serve a similar purpose, but shoe molding is narrower and more vertical, while quarter round has a fuller rounded shape.

The right choice depends on baseboard design, flooring style, and desired look; slimmer shoe molding often creates a cleaner contemporary look.

Hardwood Floor Transitions

Clean Connections Between Materials and Heights

Transition Types

Transitions connect wood flooring to other materials or areas with different heights, creating a finished edge while letting the flooring system function properly. Common transitions include:

  • Hardwood to tile
  • Hardwood to carpet
  • Hardwood to vinyl
  • Hardwood to laminate
  • Hardwood to stone
  • Hardwood to concrete
  • Hardwood to wood

The profile is selected based on the height difference and materials involved.

T-Molding Installation

T-molding bridges the joint between two surfaces of about the same height, such as hardwood to hardwood or laminate. Matching T-molding creates a smoother visual connection between rooms.

Reducer Installation

Reducers slope gradually from wood flooring down to a lower surface such as vinyl, concrete, or lower tile, reducing an abrupt edge.

Carpet & Tile Transitions

Where hardwood meets carpet, the transition secures and finishes both edges without leaving exposed hardwood. Tile and hardwood often meet in kitchens, bathrooms, and entryways, either flush when heights match or with a reducer, planned to keep the transition narrow and clean.

Trim for Floor Height Changes

Remodeling can create different floor heights between rooms. Reducers, ramps, thresholds, or custom transitions bridge the difference with a smooth walking surface and an intentional look.

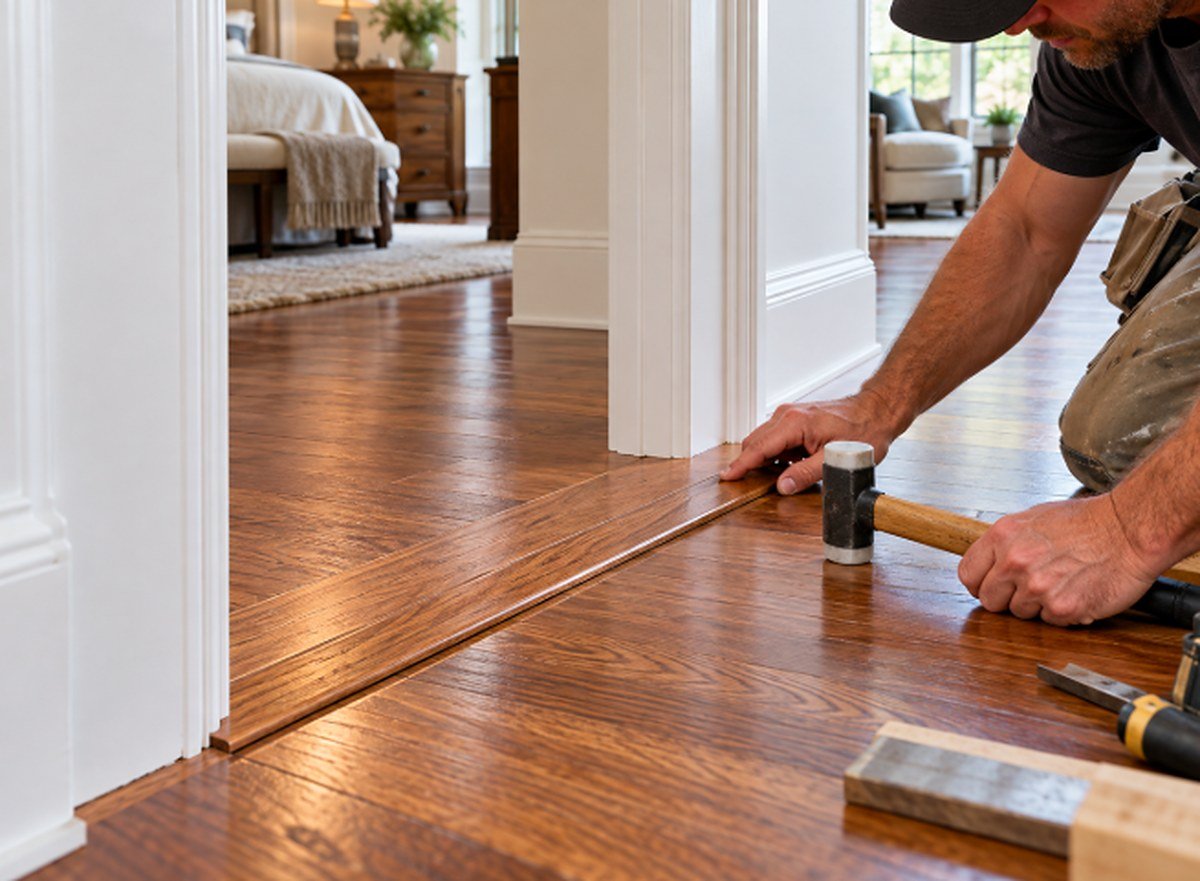
Installer fitting a hardwood threshold transition in a doorway

Doorways & Thresholds

Interior, Sliding, and Exterior Door Finishing

01

Threshold Installation

Thresholds connect interior flooring, exterior doors, bathrooms, balconies, and rooms. Wood thresholds can be stained to match the hardwood, and proper fit matters because they take frequent foot traffic.

02

Doorway Finishing

Flooring must fit around door jambs, casings, and thresholds. Undercutting door casings lets the floor extend beneath the trim, and accurate cuts help avoid visible gaps.

03

Trim Around Sliding Doors

Sliding glass doors may need thresholds or low-profile trim where hardwood meets the frame, with proper spacing so the floor can expand without interfering with the door.

04

Exterior Door Thresholds

Exterior doorways need durable transitions. Flooring ends cleanly at the threshold while accounting for moisture, door clearance, and expansion space, using existing or new transition pieces.

Stair Nosing & Landing Trim

Finished Edges for Hardwood Staircases

01

Stair Nosing

Stair nosing creates the finished edge at the front of a tread or landing, matched to the flooring species and stain or part of a manufacturer stair system. Popular profiles include:

  • Flush nosing
  • Overlap nosing
  • Square-edge
  • Rounded
  • Modern low-profile

The right option depends on the floor and staircase construction.

02

Landing Trim

Stair landings may need custom trim where the floor meets stairs, walls, railings, or adjacent flooring.

Careful finishing creates a continuous look between the staircase and surrounding hardwood, and landings can include decorative borders or directional plank changes.

Custom Trim & Matching

Built-Ins, Cabinets, Fireplaces, Columns, and More

01

Custom Wood Trim

Made where standard molding doesn't fit, such as unusual transitions, curved walls, built-in cabinetry, fireplaces, staircases, or historic details, stained or finished to coordinate with the floor.

02

Matching Trim to Hardwood Flooring

Trim can use the same species and stain for a seamless look, or be painted to match walls or baseboards for stronger contrast. The best choice depends on your interior style.

03

Trim Around Kitchen Cabinets

Where flooring meets toe kicks, cabinet panels, and islands, trim covers expansion gaps without interfering with cabinet doors or appliances, kept as discreet as possible.

04

Trim Around Built-Ins

Bookshelves, entertainment centers, benches, and built-ins create unusual floor edges. Custom trim finishes them neatly, painted to match the built-in or stained to match the floor.

05

Trim Around Fireplaces

Where hardwood meets stone, brick, or tile, a clean expansion gap and fitted transition are needed. Flooring may be cut directly to the hearth or finished with custom molding.

06

Trim Around Columns

Columns in open floor plans need precise cuts and perimeter finishing. Small molding pieces or carefully fitted boards create a clean look based on the column shape and layout.

Wood Floor Vent Finishing

Flush-Mount and Surface-Mount Wood Registers

01

Floor Vent Finishing

Floor vents can be finished with standard metal covers or custom wood registers.

Wood registers can be stained to coordinate with the hardwood, while flush-mount vents create a more integrated look but should be planned during installation.

02

Flush-Mount Wood Vents

Flush-mount vents sit level with the surrounding floor for a premium, custom look, with the vent frame becoming part of the flooring.

The opening must be measured and prepared accurately before the surrounding boards are completed.

03

Surface-Mount Wood Vents

Surface-mount wood registers sit over the finished opening, are easier to replace, and can still be stained to match the floor.

This option is often used in existing homes or replacement flooring projects.

Trim for Every Floor Style

Modern, Traditional, Wide Plank, and Patterned Floors

01

Modern Floor Trim

Modern trim uses clean lines and minimal profiles:

  • Square baseboards
  • Slim shoe molding
  • Flush transitions
  • Square stair nosing
  • Minimal thresholds

Natural white oak with simple painted trim is a popular contemporary combination.

02

Traditional Floor Trim

Traditional interiors may use detailed baseboard profiles, stained wood molding, and decorative transitions.

Trim coordinates with crown molding, door casing, and other architectural details for a consistent look.

03

Trim for Wide Plank Flooring

Wide plank floors have a clean, upscale look, so trim should complement it.

Simple baseboards, low-profile transitions, and carefully matched stair components help maintain the visual impact of wider boards.

04

Trim for Herringbone Flooring

Herringbone floors often benefit from a perimeter border that gives the pattern a clean stopping point and frames the room.

Standard baseboards are then installed around the perimeter for a highly finished custom look.

05

Trim for Chevron Flooring

Chevron patterns require precise edges because the angled boards draw attention to alignment.

A border or carefully planned perimeter detail creates a clean transition between the pattern and walls.

06

Wood Floor Edge Finishing

Exposed flooring edges can occur around steps, raised areas, sunken rooms, platforms, or transitions.

Special trim pieces protect these edges while providing a finished appearance.

Trim by Installation Method

Expansion Gaps, Floating, Nail-Down, and Glue-Down Floors

01

Expansion Gap Finishing

Wood flooring needs space around walls and fixed objects to respond to environmental changes. Baseboards and molding cover this gap without incorrectly fastening the moving parts of the floor.

02

Trim for Floating Wood Floors

Floating floors must stay free to move as a connected surface, so baseboards, shoe molding, transitions, and thresholds are installed per the system's requirements without restricting movement.

03

Trim for Nail-Down Hardwood

Nail-down hardwood also requires perimeter spacing. Baseboards or shoe molding cover the expansion area, and transitions and stair nosing are installed to suit the floor and subfloor.

04

Trim for Glue-Down Hardwood

Glue-down installations use similar trim, but floor height and transitions can differ. Low-profile reducers and flush transitions are common where glue-down engineered wood meets other materials.

Finishing Details & Trim Repair

After Carpet or Tile Removal, Corners, Caulking, and Repairs

01

Trim After Carpet Removal

Removing carpet often reveals gaps between the old floor and baseboards, and new hardwood may change floor height. Baseboard adjustment, shoe molding, or new trim creates a clean perimeter.

02

Trim After Tile Removal

Tile and mortar can sit at a different height than hardwood, leaving baseboards or door casings at the wrong height. Trim work corrects these changes after the new floor is installed.

03

Baseboard Repair

Existing baseboards may have small cracks, nail holes, separated joints, or surface damage. Minor repairs are completed before repainting or reinstalling, and badly damaged pieces are replaced.

04

Mitered Corners

Outside corners typically use mitered joints, while inside corners may be mitered or coped depending on the trim style. Clean corners make a big difference in the finished look.

05

Caulking and Nail-Hole Finishing

Painted baseboards may need nail-hole filling, caulking, sanding, and touch-up paint for smooth joints. Stained trim uses different methods to preserve the natural wood appearance.

06

Touch-Ups and Final Detailing

Finishing includes touching up paint or stain and a final inspection, so every edge, corner, and transition looks clean and consistent throughout the room.

Residential & Commercial Flooring Trim

Consistent Finishing Throughout the Property

01

Residential Flooring Trim

We complete flooring trim throughout the home:

  • Living rooms
  • Bedrooms
  • Kitchens
  • Hallways
  • Dining rooms
  • Offices
  • Entryways
  • Staircases
  • Condos
  • Townhomes

Matching trim through several rooms creates a consistent appearance. See residential flooring.

02

Commercial Flooring Trim

Commercial wood flooring may require durable transitions, thresholds, base trim, and stair details.

Offices, retail stores, hospitality spaces, salons, and other businesses see heavier traffic, so finishing products are selected accordingly.

Trim & Finishing Installation Process

A typical trim project may include the following steps. The exact process depends on the flooring system and selected trim.

  1. 01Inspecting existing molding
  2. 02Determining what can be reused
  3. 03Removing baseboards if required
  4. 04Installing the new flooring
  5. 05Measuring perimeter gaps
  6. 06Cutting baseboards and molding
  7. 07Installing transitions and thresholds
  8. 08Installing stair nosing when applicable
  9. 09Filling appropriate nail holes
  10. 10Completing caulking or finishing work
  11. 11Touching up paint or stain
  12. 12Performing a final inspection

Trim & Finishing FAQs

Answers to Common Baseboard and Transition Questions

1.

Do I need to remove my baseboards when installing new hardwood?

Often, yes. Removing baseboards lets us leave the proper expansion gap around the room and tuck the flooring neatly underneath for the cleanest edge. Many baseboards can be carefully removed and reinstalled, but older or brittle trim may crack and need replacing. If baseboards stay in place, we can cover the gap with shoe molding or quarter round instead.

2.

What is the difference between shoe molding and quarter round?

Both cover the expansion gap where the floor meets the baseboard. Quarter round has a fuller, rounded profile, while shoe molding is narrower and more vertical, so it looks slimmer and sleeker. Shoe molding is popular in modern Los Angeles homes, while quarter round is common when existing baseboards remain. Either can be painted or stained to match your floor or trim.

3.

Why can't the flooring go tight against the wall?

Wood naturally expands and contracts with changes in humidity and temperature. If it's installed tight to the walls, it has nowhere to move and can buckle, cup, or gap. That's why we leave an expansion space around the perimeter and fixed objects, then cover it with baseboards, shoe molding, or quarter round for a clean, finished look.

4.

What transition should I use between hardwood and tile?

It depends on the height difference. If both floors are the same height, a flush or T-molding transition creates a smooth, narrow joint. If the tile is lower or higher, a reducer or custom transition bridges the change safely. We plan transitions before installation so they're as low-profile and clean as possible, and can stain wood transitions to match your floor.

5.

Can you match new trim and transitions to my hardwood floors?

Yes. Wood transitions, thresholds, stair nosing, vents, and baseboards can be made from the same species and stained to match your floor for a seamless look. Many homeowners prefer painted white baseboards with matching wood transitions for contrast. We help you choose a combination that fits your interior style and coordinates with your doors, casings, and cabinetry.

Complete Your Hardwood Flooring Project With Professional Finishing

A Beautiful Floor Doesn't Stop at the Last Plank

A beautiful hardwood floor should not stop at the last plank. Proper baseboards, molding, thresholds, transitions, stair nosing, and custom trim help bring the entire installation together.

Whether your project requires new baseboards, matching wood transitions, stair trim, shoe molding, or detailed custom finishing, careful installation can create a cleaner and more polished result throughout the property.

Contact us to discuss trim styles, transition options, baseboards, thresholds, stair details, and finishing services for your wood flooring project.

Book Service

Get a Free Estimate for Your Wood Flooring Project